G’day fellow skiers! Ready to take your skiing up a notch? Whether you’re just starting to explore carving or you’ve been skidding around awkwardly for a while, getting carving right can totally change how you experience the mountain. In this guide, I’ll share the techniques, drills, and a few advanced tips that helped me nail those crisp, clean turns—and I promise, it’s way more fun once you do.
Quick Steps to Start Carving

1. Find the Right Terrain: Choose a flat, less busy slope to practice.
2. Get Balanced: Slightly lean forward on your skis to feel how they want to carve.
3. Practice J-Turns: Use your knees and hip to create tighter turns.
4. Develop Edge Angles: Shift your weight for greater control during sharp turns.
Understanding the Science of Ski Carving
How the Shape of Your Ski Affects Carving
Ever wonder why carving skis look a bit unusual? That tapered shape—narrow in the middle, wider at the tips—isn’t just for style. It literally changes how your skis bend and turn.
- At a low edge angle, your skis bend mildly, giving you longer, smoother turns.
- Crank up that edge angle and the skis dig in, letting you carve sharp, snappy turns.
It all comes down to how much pressure you put on your edges and where your body weight goes.
The Difference Between Skidded and Clean Cut Turns
Here’s the real deal:
- Skidded turns are more about steering than carving—great for dodging bumps or soft snow, but not exactly heart-pounding.
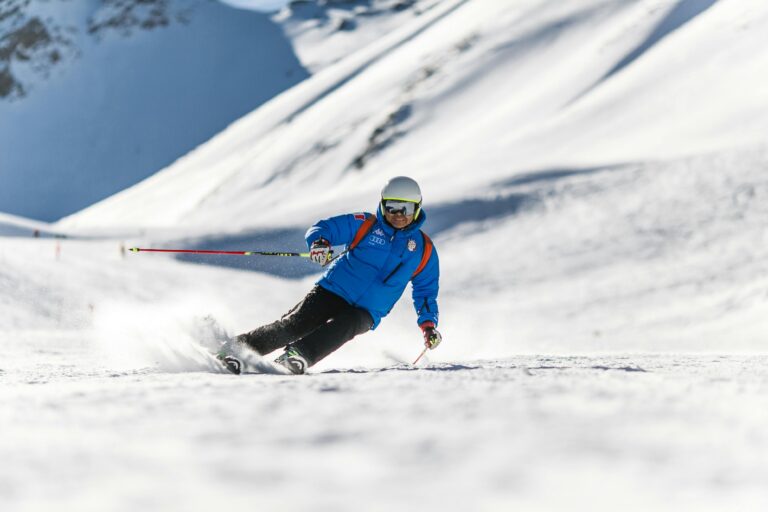
- Carved turns slice clean lines in the snow. It’s the kind of turn that makes you want to show off.
Actionable Drills for Developing Your Carving Skills
Step 1: Find the Right Terrain
Pick a gentle, quiet slope where you can play around without worrying about crashing into others. Trust me, safety first makes learning way more fun.
Step 2: Baby Steps Towards Carving
- Find Your Balance: Stand still, lean a little forward—it doesn’t have to be much. Feel how your skis naturally want to carve? That’s your starting point.
- Create a Traverse: Point your skis about 15 degrees downhill. Lean forward just a touch and let your skis slide sideways. This sideways glide is where carving begins.
Step 3: J-Turns for Sharper Control
- Start by pointing your skis at about 45 degrees down the slope and pick up some speed.
- Roll your knees over as you shift your hip towards the inside ski. This helps you carve tighter, sharper turns.
Keep an eye on your tracks—clean arcs mean you’re on the right track!
Step 4: Mirror Training
This one’s a bit quirky but trust me: put on your ski boots at home and practice in front of the mirror.
- Knees bent, feet shoulder-width apart.
- Rock side to side, get a feel for the movement you’ll need on the slopes.
It sounds silly, but it helped me connect how I move off snow.
Enhancing Edge Angles
Understanding Edge Angles
If you’re slipping on steep terrain, you’re probably not angling those edges enough.
- A 51-degree edge angle is okay, but a solid 59 degrees? That’s when your skis really grip the snow.
Practice Maintaining Edge Angles
- Smooth out your transitions between turns—don’t rush.
- Lean a bit inward and let that inside leg soften to keep your edges engaged.
- Drag your outside pole through the snow during turns—it helps remind your body where to be.
The Art of Mad Angles
What Are Mad Angles?
“Mad angles” might sound wild, but they’re just what you use to carve with control on fast runs.
- Inclination keeps your body aligned for stability.
- Toppling motion is rolling your knees inward and shifting your hips to carve efficiently.
Tips for Experimentation
Try carving different sized C-shaped turns and use gentle weight shifts to manage your speed. It’s like painting your own snow masterpiece.
Additional Tips for Perfecting Your Turns
- Keep your weight forward—leaning back is the fastest way to lose control.
- Mix practice of clean J-turns and smooth railroad turns to build confidence and flow.
- Check your knee and ankle alignment as you move from ski to ski—tight coordination makes your turns effortless.
Common Mistakes to Avoid
- Leaning back—trust me, this kills your control.
- Over-rotating your turns—slow down your upper body and let the skis do their job.
Summary Table: Crafting Your Carving Turns
| Technique | Key Focus | Ideal Condition |
|---|---|---|
| Low Edge Angle | Transition control | Gentle slopes |
| High Edge Angle | Sharp, quick turns | Steep or icy terrain |
| J-Turns | Balance and speed | Medium gradients |
| Mad Angles | Fluid carriage | Fast speeds |
| Mirror Training | Body positioning | At home for practice |
With these tips and drills, you’ll see your carving go from awkward to awesome. Skiing’s all about the thrill—and those moments when your skis carve a perfect arc in the snow? Nothing beats that feeling.
For more tips, check out our articles on ski techniques, balancing your ride, and refining your carving.
Happy carving! Before you hit the slopes, here’s a great video to get your head around ski mechanics:
Understanding Ski Mechanics:
Go on, carve those mountains with style—and remember to have fun out there!


